Initial Setup
In order to use the online payment system, there are a number of
prerequisites and procedures that need to be carried out:
Create a PayPal Business Account.
(It must be a business account to get the PayNow button
functionality, but it is free to upgrade a personal account to a
Business one).
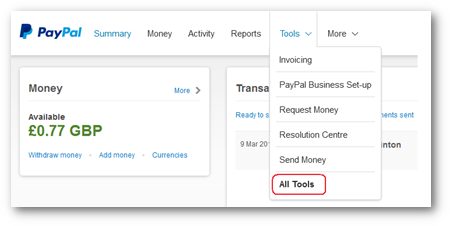
Once done, login, click on Tools and then All Tools:
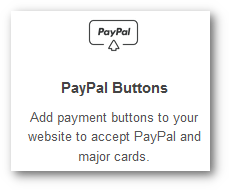
Scroll down to the PayPal buttons box and click:
You will see a page similar to this:
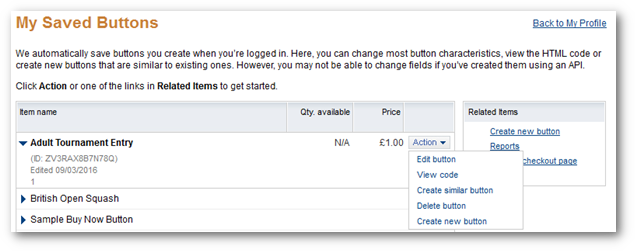
Initially you will only see some sample buttons, so click on the Create
new button link under Related Items.
Creating a Button
This is pretty self-explanatory but the main things are a name, a price
and make a selection in the Customise button section.
If an entrant is only allowed to enter one event at a time, then you do
not need to customise the button.
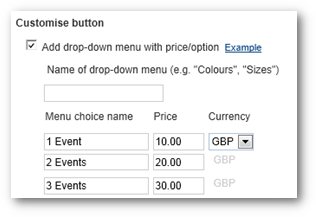
However, if an entrant can enter a number of events for the same
tournament, then you can allow for this by ticking “Add drop-down menu
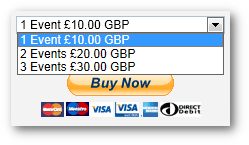
with price/option” and adding menu choices as follows:
When entering payment, an entrant will then see the following:
Adding Return Address
It is important that an entrant is taken back to League Master to the
relevant page, depending upon the outcome of the payment process.
Click on Step 3 and go down to the bottom:
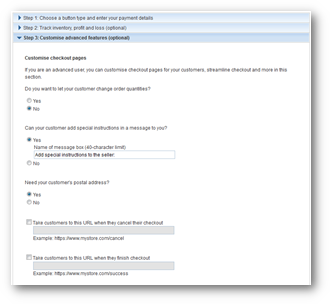
There are two sections to fill in:
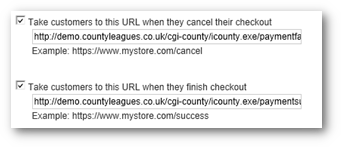
The exact URLs are dependent upon your League Master web site account,
but the general format is:
https://yourdomain.leaguemaster.co.uk/cgi-county/icounty.exe/paymentfail
https://yourdomain.leaguemaster.co.uk/cgi-county/icounty.exe/paymentsuccess
Click Save Changes at the bottom.
You will now see the “Add your button code top your webpages” page.
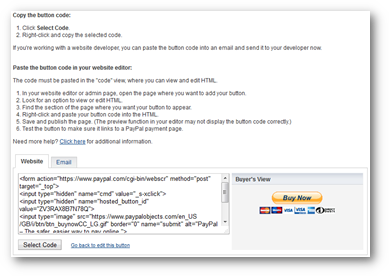
At this point, you have created the button in PayPal and no more is
needed in your payPal account. However, you now need to copy the code as
shown above and transfer it into League Master as a Payment
Source.
Return to League Master and navigate to the Tournaments & Events home page > Tournament Settings > Payment Sources page and create a new Payment Source.
The Payment Name is the name as it will appear on the Tournament Setup page, and the Pay Code is where you paste the code from PayPal that was copied above.
If you have already created a tournament, then navigate to the Online Payment section of the Tournament Setup page and select it as the Payment Code.
Multiple Entry Costs
The system outlined above allows you to add a default PayPal code, which
equates to a default PayPal button, and each button has it’s own prices
associated with it.
For many users this will be all that is needed, particularly if you have
only one cost of entry.
However, if you run tournaments that have different costs, then you will
need to create more buttons.
 |
Tip: As you create new tournaments, you may need different payment options and different costs. Simply create a new button in PayPal, create a new Payment Source and copy the new code into it. You will then have a number of options that you can select from in the Payment Code drop-down selection list. |